The Care & Keeping of Grassroots Hats
"How should I clean my hat?", "My hat doesn't fit right,", "How do I store my hat collection?" These are common issues and frequently asked questions, and I want you to know we are here to help! From cleaning and resizing to storing, collectors tips, and resale advice, we're dropping the hat knowledge right now. Here is everything you need to know about properly caring for and keeping your Grassroots hats.
Cleaning

We know you throw that lid over your sweaty scalp, unshowered hair, and festival grime, but there is something you can do to keep your hats clean, fresh, and sanitary. Here are our tips for cleaning and maintaining a healthy hat:
1) Spot clean as needed with dish soap, water, and a toothbrush. This will take care of the pizza sauce on that front panel and the dirty fingerprints on your brim. The toothbrush is soft enough that it won't damage the fabric and rinsing with soap and water should take care of most stains, smudges, and signs of wear. Add a little hydrogen peroxide to help minimize red wine and blood stains.
2) Wash your hat when you shower (or sink). Get a light, non-scented, bleach-free laundry detergent or dish soap (no shampoo!) and scrub it gently into the panels and brim and rinse with warm water. This will help get rid of sweat stains, dirt, sand, and dust that's living in your hat's fabrics. If your lid is extra oily, try making a paste with baking soda and water, apply all over, and rinse thoroughly. You can do the same for your hair! We suggest doing this routinely every 4-6 months or after a long festival run in the same hat. Do not use hot water and let your hat air-dry to prevent shrinkage.
3) Stick your lid in the Dishwasher. For this method, you may want to invest in a "Hat Washer" to protect the shape: totally optional. Place your lid in the top rack of your dishwasher and rinse in a warm-water cycle with no detergent. DO NOT try this method with any dishes or other items in the dishwasher. We honestly don't recommend washing in a washing machine since the spinning and tumbling may ruin the hat.
4) Consider Waterproofing or Sweat-Preventative Hat Spray. Using these products can change the smell and texture of your hat, but ultimately may protect your hat from buildup and discoloration. If you plan to wear your hat, we suggest these products for long-term protection. Else, leave them off and go au-natural.
Resizing


If your hat is brand new with tags and was purchased within 60 days from Grassroots Colorado or Grassroots Chicago storefront, or online from our website, you can return or exchange your hat! The process starts online using Return Logic. Else, here's our guide to resizing hats so your lid fits you!
1) Help! My Hat is Too Big! One way to "shrink" your hat a bit is to wash and dry it! The hot water will swell the fabric with liquid, and then high heat will constrict the fibers and shrink them. Though this will deteriorate your hat over time, it will help make them a bit smaller. This works especially well with our sublimated and hemp hats. If you have a lot of hair (or grow your hair out), you can help take up some of that extra space. Braids, ponytails, and wigs are other ways to fill some of that space and make your hat fit more snugly to your head.
2) Help! My Hat is Too Small! We have a few methods you can try... First, get your hat completely wet in cold/warm water (either in the sink or shower) and let it air dry (on your head, if you can). As the fabric swells with water, the fibers will tear and stretch. As long as you don't use heat to dry the hat, the fibers will remain stretched as it dries. Repeat this process a few times. Next, grab a gallon-size Ziploc bag and fill it with water. Once the bag is sealed, drop it in the center of the panels and stick it in the freezer. As the water expands, so will your hat. To remove, let the ice thaw a bit and carefully remove the plastic bag. You can also invest in a Hat Stretcher to manually crank your hat to the desired size over time.
3) Help! The Snaps are Well-Worn and Don't Stick! Never fear, Grassroots is here! For a quick, temporary solution, you can rubber band the snap-strips in place: the smaller the rubber band, the less noticeable it will be. You can also use sticky-tack to help the snaps better snap and stay in place. For a more permanent solution, you can use hot glue, super glue, or epoxy to connect the two plastic snap-strips together.
4) Help! The Strap or Snaps have Fallen Apart! Similar to the above solution, sticky tack is a temporary solution that may work short-term. Hot glue or super glue can work really well here if set and dried properly. Additionally sewing the strap or snap in place can help. You might also check with your local dry cleaners or tailor shop: some tailors will offer this as repair service for as little as $10-20 to fix.
Storing
 Of course, we have a large collection of hats and do our best to display them in ways that protects the integrity of each hat. For the record, we don't recommend hanging them from pushpins or nails in the wall since it can misshape and stretch the hat overtime. Instead, we want to keep the hat resting as flat as possible. Avoiding direct sunlight is a must, as it can discolor and fade fabrics very quickly, so using dark color or opaque storage solutions is a must! Folding the back panel into itself is totally fine and can save space. Here are some of our favorite storage solutions:
1) Invest in a hanging closet organizer, like this one. Whether you use each space for one hat, or fold your back panels in and get multiple in each section, you'll be able to store your hats and display them quite nicely. Some even have dust curtains which are great for long-term and traveling!
2) Try an organizer that clips hats in a row, like this one! Instead of "hanging" from a strap or single panel, the top of the hat where the 6-panels meet has more piping and stitching and is much more sturdy to support a hat's weight. The clip may pinch the fabric over time so keep an eye on this to maintain the hat's shape and quality.
3) Try storage bags or container bins for maximum protection for large quantities of hats. We travel with hundreds of hats to festivals every summer and use industrial bins similar to these to transport and store hats safely. With the hats folded and stored in order of size: smaller sizes towards the back and larger sizes towards the front. Stackable bins are great for closets and attics and will keep dust, water, insects, and some molds from reaching your hats. Avoid sunny or well-lit areas and consider all-black or opaque bins too!
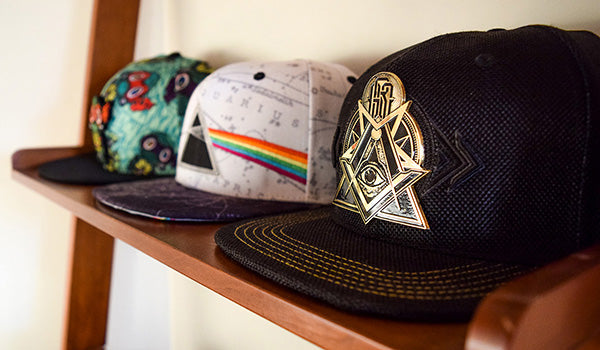
 4) Create a display and shelve them! Our storefronts created shelving from 3/4" steel pipe (8-12" long), 3/4" steel pipe caps, 3/4" iron floor flanges (with screws), and 2'x8' lumber for shelves! We sanded and stained our wood for a uniform look but it could be painted or left as is. This modern, industrial look was great for displaying hats in rows and served as a way to display art, shoes, bags, and other GRC products as well!
Collecting

Many of you may collect your caps and never actually wear them. So here's some of our advice for properly collecting and maintaining its quality.
1) Keep the tags, stickers, accessories, and original packaging! Any product that's "NWT" (New, With Tags) is instantly better quality than those without. The sticker is not only a symbol of authenticity and indicator of size, but it also shows that the product was most likely purchased new. If the hat came with any patches, pins, bags, or stickers, these will all help maintain the collector's value and authenticity!
2) Avoid storing or displaying in direct sunlight or bright lights. Fabric colors will definitely fade over time (sometimes rather quickly!) and, depending on the direction of the light, will leave uneven discoloration.
3) Leave snaps and straps in place as purchased. This is one of the most obvious signs of wear and one of the easiest ways to damage a hat. It can create new folds, bends, and creases. Unless you plan to wear the product and need to resize it, leave it alone.
4) Avoid pins, sprays, and accessories, and wear as little as possible. Pins obviously leave holes in the product which can be noticeable and damage the fabric. With a hemp hat, try to pin the posts in between strands to avoid damaging the fibers. Stickers can leave a residue behind that collects dirt and look smudged. Sprays can discolor and change a hat's texture.
Reselling
As a major brand in the hat community, our following is quite large. With retailers, collectors, customers and fans around the world, we want to keep the community connected, especially for people looking for and trying to sell or trade our hats. We suggest everyone use the Grassroots California Hats for Sale or Trade Facebook Group. This is a common space for collectors, retailers, and customers to connect. Here, group members can post ISOs (In Search Of) and FS/FT (For Sale/For Trade) posts, host auctions, check pricing, find out more about a specific hat, etc. Please remember most of our products are limited edition so we encourage thorough research when posting or purchasing sold out hats.
